Use this tool to download YouTube thumbnails.
How to download YouTube Thumbnails
Step 1 – Go to YouTube and search for any video
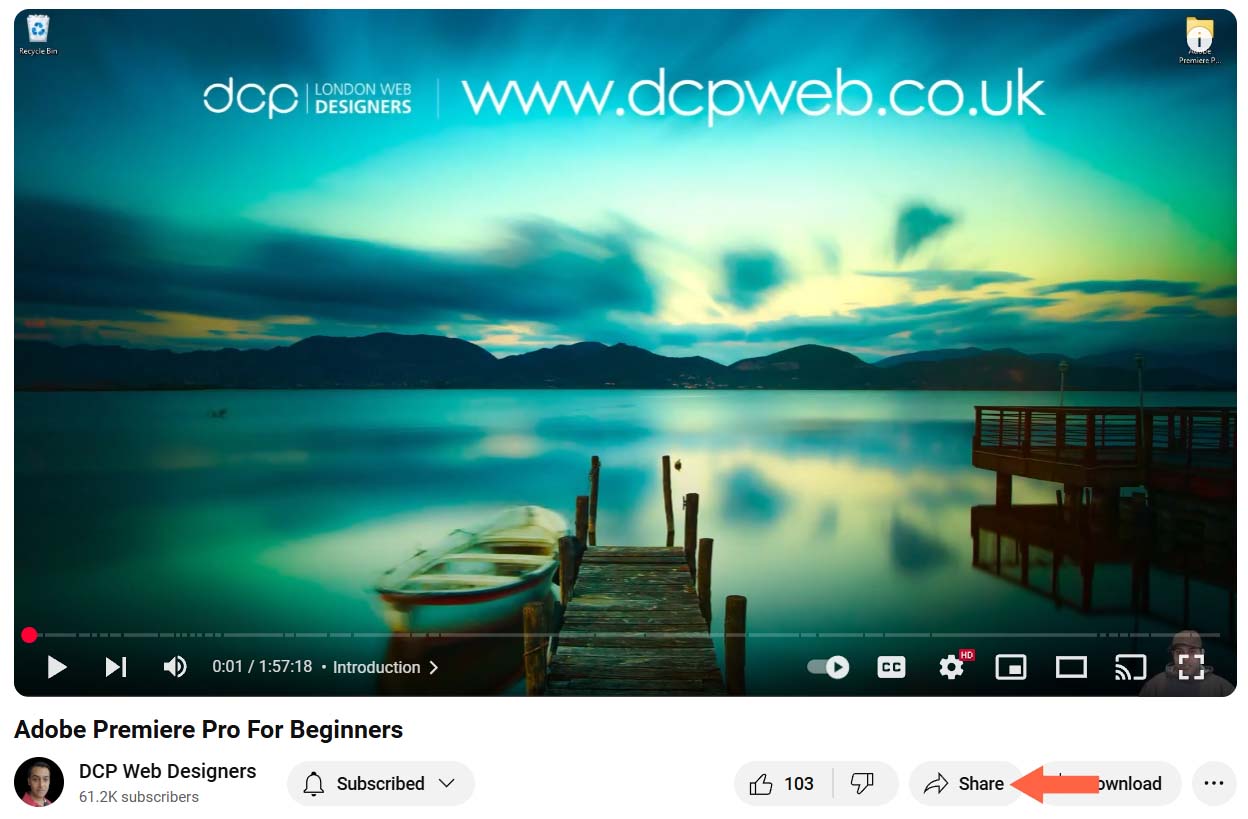
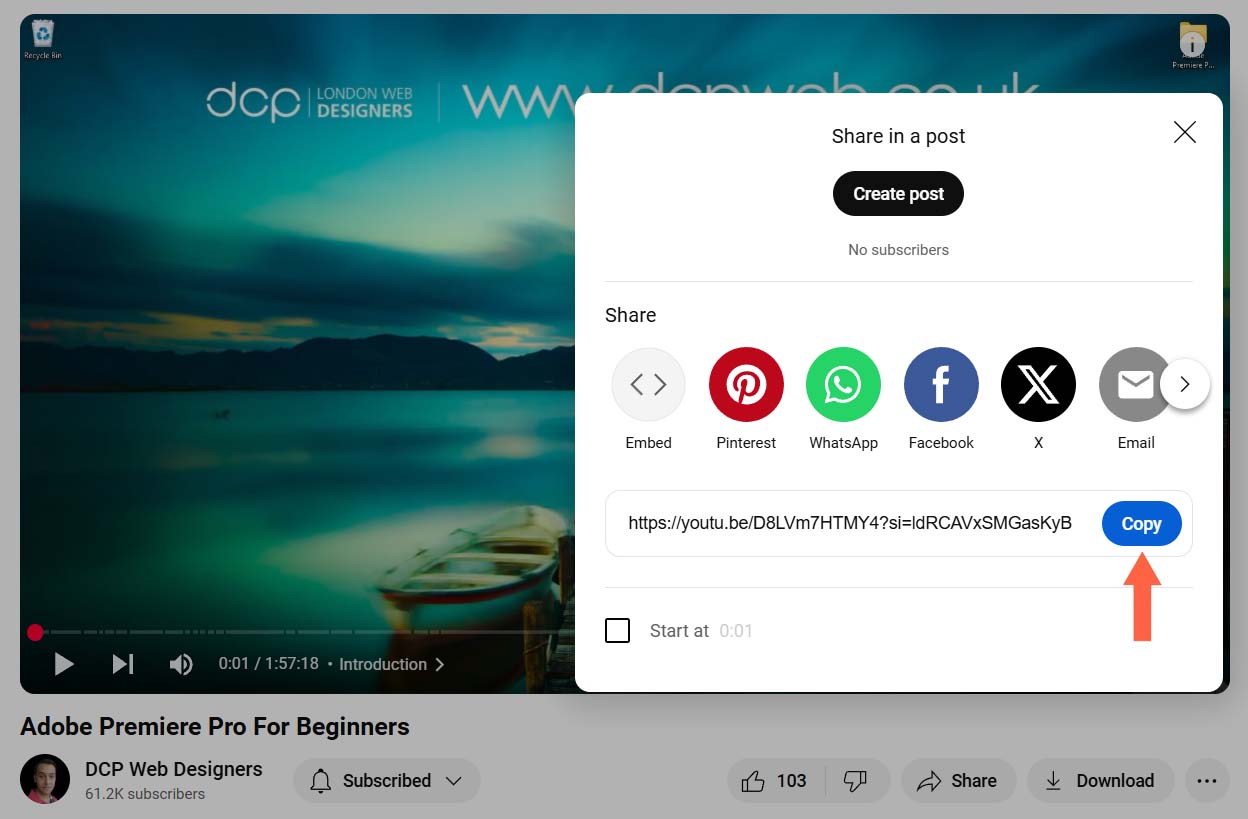
Step 2 – Click the share button and copy the video URL (See images below)
Step 3 – Paste the URL into the tool above and then click the “Get Thumbnail” button
Step 4 – Right click on the thumbnail and select “Save Images As” to download
Breakdown of how the tool works programmatically
Form and Input Handling
- User Input: The HTML form contains an input field where users enter a YouTube URL. The input is marked as required and has a maxlength attribute to restrict its length.
- Prevent Default Submission: When the form is submitted, JavaScript intercepts the event (using e.preventDefault()) to prevent the page from reloading.
Extracting the YouTube Video ID
Regular Expression: The extractVideoID function uses a regular expression to extract the 11-character video ID from various YouTube URL formats (like standard URLs, embedded URLs, or shortened URLs). If the URL doesn’t match the expected format, the function returns null.
Generating Thumbnail URLs
URL Construction: Once the video ID is successfully extracted, two thumbnail URLs are generated:
- Low Resolution: Uses the URL pattern https://img.youtube.com/vi/<videoID>/hqdefault.jpg.
- High Resolution: Uses the URL pattern https://img.youtube.com/vi/<videoID>/maxresdefault.jpg.
Displaying the Thumbnails and URLs
Dynamic HTML Output: The code then updates a hidden <div> (with id result) to display the results. It constructs HTML that:
- Shows each thumbnail as an image (<img> element).
- Displays the corresponding URL below each image as a clickable link.
User Experience: This dynamic update provides immediate visual feedback without needing to reload the page.
Clipboard Copy Functionality
Copy Button: For the high-resolution thumbnail, a “Copy URL” button is included.
Confirmation Prompt: When the button is clicked, a confirmation dialog appears to ensure the user intends to copy the URL.
Copy Process: If confirmed, a temporary input element is created and added to the DOM. The high-res URL is placed in this input, selected, and then copied to the clipboard using document.execCommand(‘copy’). Afterwards, the temporary element is removed from the DOM.

FAQs about YouTube Thumbnails
The correct size for YouTube thumbnails is:
Resolution: 1280 x 720 pixels
Minimum width: 640 pixels
Aspect ratio: 16:9
File size limit: Under 2MB
File formats: JPG, PNG, GIF, or BMP
Pro tip: Always design your thumbnail at 1280×720 even though it appears smaller in YouTube’s interface. This ensures high-quality display on larger screens and improves click-through rates.
Need tips on designing eye-catching thumbnails?
Watch these tutorials:
1. Canva (Free + Pro version)
Why it’s great: Drag-and-drop interface, tons of YouTube thumbnail templates, easy to use.
Best for: Beginners and casual creators.
Website: canva.com
2. Adobe Express (Free + Premium)
Why it’s great: Clean interface, integrates with Adobe Creative Cloud, solid template selection.
Best for: Creators who want professional-looking thumbnails fast.
Website: express.adobe.com
3. Photoshop (Paid)
Why it’s great: Full creative control, advanced editing, industry standard.
Best for: Professional designers or advanced users.
Website: adobe.com/products/photoshop
4. Snappa (Free + Pro)
Why it’s great: Simple interface, custom dimensions, pre-made graphics.
Best for: Marketers and YouTubers who want fast results.
Website: snappa.com
5. Fotor (Free + Pro)
Why it’s great: AI-powered design tools, built-in templates, text effects.
Best for: Quick edits and stylish designs.
Website: fotor.com
6. Pixlr (Free + Premium)
Why it’s great: Browser-based, powerful editing tools, no installation needed.
Best for: Users who want Photoshop-like features for free.
Website: pixlr.com
7. Picsart (Free + In-App Purchases)
Why it’s great: Great for mobile editing, fun effects, stickers, and overlays.
Best for: Creators who edit thumbnails on their phones.
Website: picsart.com
You should save your YouTube thumbnail in one of the following supported formats:
JPG (JPEG)
PNG
GIF
BMP
Among these, JPG and PNG are the most commonly used. PNG is ideal if your thumbnail includes text or graphics that need to stay crisp and clear, while JPG is great for photo-based thumbnails with a smaller file size.
Tip: Make sure your file size is under 2MB and your image dimensions are 1280 x 720 pixels for best results.
Yes, you can change your YouTube thumbnail at any time after uploading your video.
Here’s how to do it:
Go to YouTube Studio: studio.youtube.com
In the left menu, click Content.
Find the video you want to edit and click the pencil icon (Details).
Scroll down to the Thumbnail section.
Click Upload thumbnail and choose your new image.
Click Save in the top right corner.
Note: You must have a verified YouTube account to upload custom thumbnails. If you’re not verified yet, YouTube will only let you choose from auto-generated thumbnails.
A good YouTube thumbnail grabs attention, creates curiosity, and clearly represents your video’s content. Here are the key elements:
1. Clarity and Simplicity
Use bold text and simple visuals.
Avoid clutter — thumbnails should be easy to understand at a glance.
2. Human Faces and Emotions
Thumbnails with expressive faces (surprised, happy, confused) get more clicks.
Eye contact helps draw viewers in.
3. Bold, Readable Text
Use large, high-contrast fonts that stand out even on mobile screens.
Keep text short — 3 to 5 words is ideal.
4. Bright Colours and Contrast
Use vivid colours like red, yellow, or blue to catch the eye.
Make sure text and images pop against the background.
5. Consistent Style
Use the same fonts, colours, and layout across your channel for branding.
Viewers will start to recognise your content instantly.
6. Curiosity and Value
Tease what’s inside the video — ask a question or hint at something intriguing.
Show the value or benefit of watching (e.g., “Save Time”, “Top 5 Tips”).
7. High Resolution
Use the correct size: 1280 x 720 px.
Blurry or pixelated images reduce credibility.
Step-by-Step Guide:
On Desktop:
Go to YouTube Studio.
Click Content in the left menu.
Find the video you want and click the pencil icon (Details).
Scroll to the Thumbnail section.
Click Upload thumbnail.
Choose your image (JPG, PNG, GIF, or BMP — under 2MB).
Click Save in the top-right corner.
On Mobile (YouTube Studio App):
Open the YouTube Studio app.
Tap Content and select your video.
Tap the pencil icon (Edit video).
Tap the current thumbnail.
Choose Custom thumbnail and upload your image.
Tap Select then Save.
Note:
To upload custom thumbnails, your channel must be verified.
You can verify it here.
If you’re unable to upload a custom thumbnail, it’s usually due to one of the following reasons:
1. Your account isn’t verified
You must verify your YouTube account to enable custom thumbnails.
Fix it: Go to youtube.com/verify and follow the steps to verify with a phone number.
2. You’ve received a community guidelines strike
If your channel has active strikes, some features like custom thumbnails may be disabled temporarily.
Fix it: Wait for the strike to expire or appeal it through YouTube Studio.
3. Your image file is too large or not supported
YouTube only supports JPG, PNG, GIF, and BMP formats.
File size must be under 2MB.
Fix it: Resize or compress the image, and check the format.
4. You’re using a mobile browser instead of the app or desktop
Some mobile browsers may not support thumbnail uploads.
Fix it: Use the YouTube Studio app or switch to a desktop browser.
5. You’re not in YouTube Studio
Thumbnails must be uploaded via YouTube Studio, not directly from the main YouTube site.
Fix it: Go to studio.youtube.com and upload from there.
1. First Impressions Matter
Your thumbnail is one of the first things viewers see.
A high-quality, eye-catching thumbnail can instantly attract attention and increase the chance of someone clicking your video.
2. Higher Click-Through Rate (CTR)
YouTube tracks your video’s CTR — the percentage of people who click after seeing your thumbnail.
A strong thumbnail = higher CTR = better visibility in YouTube’s algorithm.
3. YouTube’s Algorithm Loves Engagement
Videos with engaging thumbnails often get more clicks, more watch time, and more engagement — all of which tell YouTube to recommend your video to others.
4. Mobile Visibility
Most views come from mobile. A bold, readable thumbnail ensures it stands out on small screens, boosting clicks.
5. Builds Brand Recognition
Consistent, well-designed thumbnails help build your channel’s identity and encourage repeat viewers.
In short: A great thumbnail can be the difference between a viral hit and a video that gets buried. It’s one of the most powerful tools to boost your views.
There’s no exact pixel size for text on a YouTube thumbnail, but here’s what works best:
General Guidelines:
Font size should be large enough to be readable on mobile (even at 10–15% scale).
Use bold, sans-serif fonts (like Impact, Montserrat, or Bebas Neue).
Text should take up no more than 30–40% of the thumbnail.
Aim for 3–5 words max to avoid clutter.
Mobile-Friendly Rule:
If you shrink your thumbnail down to 120 x 67 px (roughly mobile size), the text should still be readable. If it’s not, increase the size or simplify the message.
Bonus Tips:
Use high-contrast colours between text and background.
Add a shadow or outline for better readability.
Keep text short, punchy, and curiosity-driven.
Yes! Following thumbnail best practices can help you grab attention, increase clicks, and boost your overall video performance.
Here are the top YouTube thumbnail best practices:
1. Use the Correct Size
Resolution: 1280 x 720 pixels
Aspect Ratio: 16:9
File Size: Under 2MB
Formats: JPG, PNG, GIF, BMP
2. Make It Visually Appealing
Use bold colours and high contrast.
Avoid clutter — keep it clean and focused.
3. Add Clear, Bold Text
Use 3–5 words max.
Pick readable fonts and make sure the text is easy to see even on mobile.
Use drop shadows or outlines for better visibility.
4. Show Faces with Emotion
Thumbnails with expressive faces (happy, shocked, curious) often perform better.
Faces create a human connection and draw viewers in.
5. Be Consistent with Style
Stick to a brand style across your thumbnails (colours, fonts, layout).
Helps build channel identity and viewer recognition.
6. Create Curiosity
Tease what’s inside without giving it all away.
Use intriguing text or visuals to spark interest and encourage clicks.
7. Avoid Misleading Thumbnails
Don’t clickbait with false info — it may hurt your watch time and lead to viewer distrust.
8. Test and Optimise
Use A/B testing tools like TubeBuddy or vidIQ to see which thumbnails perform best.
Check your Click-Through Rate (CTR) in YouTube Studio and adjust if needed.
To test which YouTube thumbnail performs better, you can use A/B testing tools or manually compare performance over time. Here’s how:
1. Use A/B Testing Tools
These tools automatically rotate different thumbnails and track performance metrics like CTR.
Top Tools:
TubeBuddy (Legend Plan)
Offers a feature called “Thumbnail A/B Testing”.
It rotates two thumbnails over a period and shows you which one performs better.
vidIQ (Boost Plan)
Includes thumbnail testing and advanced analytics.
Helps you identify what style works best with your audience.
2. Manual Testing Method (No Tools Needed)
If you’re not using paid tools, try this method:
Upload your video with Thumbnail A.
After a few days (3–7), note the Click-Through Rate (CTR) in YouTube Studio.
Swap to Thumbnail B and track the new CTR for the same amount of time.
Compare CTR, watch time, and views for both versions.
Note: Try to test during similar days/times to reduce outside influences like weekends or trends.
3. What to Track:
Click-Through Rate (CTR)
Watch Time
Average View Duration
Engagement (likes/comments)
Pro Tip:
Don’t just test the image — try testing:
Text styles
Colour schemes
Emotions on faces
Zoom levels (close-up vs wide)
Custom Thumbnail
Manually created and uploaded by you.
Designed using tools like Canva, Photoshop, or Adobe Express.
Lets you choose:
Specific images or graphics
Bold text
Branding (colours, logos, style)
Optimised for clicks and audience engagement.
Best for: Standing out, building a consistent brand, and improving click-through rates (CTR).
Auto-Generated Thumbnail
Automatically selected by YouTube from three random frames in your video.
No design, text, or branding.
Might capture a blurry, awkward, or irrelevant moment.
Limitations:
Less engaging
No control over how your content is visually represented
Can hurt click-through rates
Tip:
If you want your video to stand out and get more views, always use a custom thumbnail — it’s one of the easiest ways to boost performance on YouTube.
Yes, including your face in a thumbnail is highly recommended, especially if your content is personality-driven.
Here’s why:
1. Faces Grab Attention
Humans are naturally drawn to faces.
Thumbnails with faces often get higher click-through rates (CTR), especially when expressions are clear and emotional (e.g. shocked, happy, confused).
2. Builds Trust and Recognition
Showing your face helps viewers connect with you personally.
Over time, it builds familiarity and brand recognition, encouraging repeat views.
3. Great for Mobile Users
Faces stand out even on small screens.
A close-up shot with a clear expression is ideal.
Tips for Using Your Face in Thumbnails:
Use high-resolution images.
Zoom in for a close-up of your face.
Show a strong emotion or reaction related to the video content.
Add bold text beside your face (but don’t cover it).
When Not to Use Your Face:
If your channel is focused on products, tutorials, or animation, it might make more sense to feature the subject instead.
In that case, use eye-catching imagery, bold titles, and colour contrast.
Note:
If you’re the face of your channel or content is personality-driven, using your face in thumbnails can significantly boost engagement and trust. Just make sure the emotion matches the video’s tone.
The best colours for YouTube thumbnails are those that are bold, eye-catching, and provide strong contrast. These help your video stand out in the sea of content and grab attention, especially on mobile devices.
Top Colours That Work Well:
🔴 Red
Emotionally intense and energetic.
Great for urgency or excitement.
Pairs well with white or black text.
🟡 Yellow
Bright and positive — grabs attention instantly.
Excellent for cheerful or helpful content.
Works well with black or dark blue text.
🔵 Blue
Trustworthy, calming, and professional.
Great for tutorials, tech, and educational content.
Contrast with white or yellow text.
🟢 Green
Fresh, calm, and inviting.
Ideal for nature, health, and finance-related videos.
Contrast with white or black text.
🟣 Purple & Pink
Fun, creative, and playful.
Stand out without being harsh on the eyes.
Great for lifestyle or entertainment content.
Avoid These Common Issues:
Don’t use colours that blend in with YouTube’s UI (like grey or dull red).
Avoid low contrast (e.g. yellow text on white background).
Use complementary colours (opposites on the colour wheel) to make elements pop.
Pro Tips:
Use colour contrast between text and background for better readability.
Stick to 2–3 main colours to avoid a cluttered look.
Maintain colour consistency across your thumbnails to build brand recognition.
Yes, absolutely! You can create professional-looking YouTube thumbnails right from your phone using various apps. Many of them are free and offer templates, fonts, graphics, and editing tools optimised for mobile.
Top Mobile Apps for Making YouTube Thumbnails:
1. Canva (iOS & Android)
Easy drag-and-drop editor with hundreds of thumbnail templates.
Add text, effects, and images in minutes.
Free with optional Pro plan.
2. Adobe Express (iOS & Android)
Simple but powerful design app by Adobe.
Great for text, graphics, and social media templates.
Syncs with Adobe Creative Cloud.
Free with premium features.
3. Pixlr (iOS & Android)
Offers advanced photo editing tools and filters.
Ideal if you want more custom control.
Free with ads or paid premium.
4. Fotor (iOS & Android)
User-friendly design and photo editing app.
AI features and ready-made templates for YouTube thumbnails.
Free with premium option.
5. Picsart (iOS & Android)
Great for editing images and adding stickers, effects, and text.
Popular for YouTube, TikTok, and Instagram content creators.
Free with in-app purchases.
Pro Tips:
Always create your thumbnail at 1280 x 720 pixels with a 16:9 aspect ratio.
Use bold text, contrasting colours, and keep it simple.
Save in PNG or JPG format under 2MB.
Yes, this tool is 100% free, no login, no card payment or sign up required.
Disclaimer: DCP Web Designers are not liable for damage or loss of profits caused by using the YouTube thumbnail downloader tool on this page.